<?xml version="1.0" encoding="utf-8"?><feed xmlns="http://www.w3.org/2005/Atom" ><generator uri="https://jekyllrb.com/" version="3.9.0">Jekyll</generator><link href="/feed.xml" rel="self" type="application/atom+xml" /><link href="/" rel="alternate" type="text/html" /><updated>2026-10-09T22:00:02-04:00</updated><id>/feed.xml</id><entry><title type="html">Replacement Crystal for Citizen EcoDrive BM8180-03E</title><link href="/2026/03/21/Citizen-Crystal-Replacement.html" rel="alternate" type="text/html" title="Replacement Crystal for Citizen EcoDrive BM8180-03E" /><published>2026-03-21T00:00:00-04:00</published><updated>2026-03-21T15:38:11-04:00</updated><id>/2026/03/21/Citizen-Crystal-Replacement</id><content type="html" xml:base="/2026/03/21/Citizen-Crystal-Replacement.html"><![CDATA[<p>I recently decided to replace the crystal in one of my beater watches, the Citizen Weekender Garrison. In typical Citizen fashion there wasn’t any info on the correct crystal to buy. The nessesary size is 31.7mm by 1.5mm. You can find the correct crystal on Esslinger <a href="https://www.esslinger.com/flat-round-mineral-glass-watch-crystal-1-5-mm-thick/">here</a>. This size fits with the original gasket; I haven’t tested any replacement gaskets.</p>

<p>Unfortunately there are no fitting Sapphire crystals avaliable.</p>]]></content><author><name></name></author><summary type="html"><![CDATA[I recently decided to replace the crystal in one of my beater watches, the Citizen Weekender Garrison. In typical Citizen fashion there wasn’t any info on the correct crystal to buy. The nessesary size is 31.7mm by 1.5mm. You can find the correct crystal on Esslinger here. This size fits with the original gasket; I haven’t tested any replacement gaskets.]]></summary></entry><entry><title type="html">DIY Inexpensive Self Contained Reel EFHW</title><link href="/2025/04/06/Reel-EFHW-3d.html" rel="alternate" type="text/html" title="DIY Inexpensive Self Contained Reel EFHW" /><published>2025-04-06T00:00:00-04:00</published><updated>2025-04-06T16:30:36-04:00</updated><id>/2025/04/06/Reel-EFHW-3d</id><content type="html" xml:base="/2025/04/06/Reel-EFHW-3d.html"><![CDATA[<h1 id="about">About</h1>
<p>I have been working on making my radio kit more packable, but the first issue I ran into was that my antenna didn’t easily fit in my bag. I was using an EFHW based on a 240-43 core inside a large junction box. I designed this antenna to be nearly pocketable and very quick to deploy. I’ve since found similar antennas for sale online, but I decided to still share this design since others are quite expensive.</p>

<p>The antenna is  used somewhat like you may crank a reel on a fishing rod. You can unpack the wire by simply pulling it out while holding the outer shell, you can re-pack it by holding by the shell and cranking the center.</p>

<h1 id="parts-required">Parts required</h1>
<ul>
  <li>20awg magnet wire</li>
  <li>1x 140-43 Ferrite Toroid</li>
  <li>1x 100pf 10KV Ceramic Disc Capacitor</li>
  <li>1x SO-239</li>
  <li>4x M3x20 Machine screws</li>
  <li>4x M3 Nuts</li>
  <li>5x M3x10 Machine screw</li>
  <li>3x Small size zip-ties</li>
  <li>Various crimps for assembly, can be substituted with solder if you’re in a pinch</li>
  <li>Any antenna wire 14awg and smaller (speaker wire works)</li>
</ul>

<h1 id="downloads">Downloads</h1>
<p>Please note that these designs are <a href="https://creativecommons.org/licenses/by-nc-sa/4.0/">CC BY-NC-SA</a>, so no commerical usage is allowed.<br />
<a href="https://www.k8zdq.com/assets/reel/InnerCore.STL">InnerCore.STL</a><br />
<a href="https://www.k8zdq.com/assets/reel/OuterCore.STL">OuterCore.STL</a><br />
<a href="https://www.k8zdq.com/assets/reel/Shell.STL">Shell.STL</a><br />
<a href="https://www.k8zdq.com/assets/reel/Crank.STL">Crank.STL</a></p>

<h1 id="assembly">Assembly</h1>
<ol>
  <li>Screw OuterCore.STL and Crank.STL together with a M3x10 machine screw (back the screw out just enough that the crank can spin). Next loop a zip-tie through the two holes in the center and secure on the inside.</li>
</ol>
<picture>
    
        <source media="(min-width: 320px)" srcset="/assets/resized/1-320x336.png" />
    
        <source media="(min-width: 480px)" srcset="/assets/resized/1-480x504.png" />
    
        <source media="(min-width: 800px)" srcset="/assets/resized/1-800x840.png" />
    
    <img src="/assets/img/reel/1.png" />
</picture>

<ol>
  <li>Wind your toroid, and solder together with SO-239 &amp; capacitor.</li>
</ol>
<picture>
    
        <source media="(min-width: 320px)" srcset="/assets/resized/2-320x685.png" />
    
        <source media="(min-width: 480px)" srcset="/assets/resized/2-480x1028.png" />
    
        <source media="(min-width: 800px)" srcset="/assets/resized/2-800x1714.png" />
    
    <img src="/assets/img/reel/2.png" />
</picture>

<ol>
  <li>Secure transformer into InnerCore.STL with two zip-ties, and secure SO-239 jack with four M3x10 machine screws and M3 nuts. Attach your ground to the shield of the SO-239 with a ring terminal connector at this point.</li>
</ol>
<picture>
    
        <source media="(min-width: 320px)" srcset="/assets/resized/3-320x309.png" />
    
        <source media="(min-width: 480px)" srcset="/assets/resized/3-480x463.png" />
    
        <source media="(min-width: 800px)" srcset="/assets/resized/3-800x771.png" />
    
    <img src="/assets/img/reel/3.png" />
</picture>

<picture>
    
        <source media="(min-width: 320px)" srcset="/assets/resized/4-320x393.png" />
    
        <source media="(min-width: 480px)" srcset="/assets/resized/4-480x589.png" />
    
        <source media="(min-width: 800px)" srcset="/assets/resized/4-800x981.png" />
    
    <img src="/assets/img/reel/4.png" />
</picture>

<ol>
  <li>Place Shell.STL over InnerCore.STL and thread your antenna wire through OuterCore.STL and out through the slot in Shell.STL (Make sure to create a knot for strain relief, this way the antenna doesn’t hang off of your crimp). Now place OuterCore.STL into the opposite side of the shell while pulling your wire the rest of the way through. Rotate both parts of the core around until the four screw holes line up viewed from the end with the SO-239 jack. Thread four M3x20 machine screws into the plastic, securing both sides of the core to one another.</li>
</ol>
<picture>
    
        <source media="(min-width: 320px)" srcset="/assets/resized/5-320x180.png" />
    
        <source media="(min-width: 480px)" srcset="/assets/resized/5-480x270.png" />
    
        <source media="(min-width: 800px)" srcset="/assets/resized/5-800x450.png" />
    
    <img src="/assets/img/reel/5.png" />
</picture>

<picture>
    
        <source media="(min-width: 320px)" srcset="/assets/resized/6-320x180.png" />
    
        <source media="(min-width: 480px)" srcset="/assets/resized/6-480x270.png" />
    
        <source media="(min-width: 800px)" srcset="/assets/resized/6-800x450.png" />
    
    <img src="/assets/img/reel/6.png" />
</picture>

<h1 id="conclusions">Conclusions</h1>
<p>I’ve been running this antenna in the field for 4 activations now. It’s held up very well printed in PETG, and is light enough to be supported by nearly any tree. It’s had no problem handling 100 watts, but you may want to stack two toroids if this is your use-case. I’ve only tested it with one toroid, but the design could probably fit two.</p>]]></content><author><name></name></author><summary type="html"><![CDATA[About I have been working on making my radio kit more packable, but the first issue I ran into was that my antenna didn’t easily fit in my bag. I was using an EFHW based on a 240-43 core inside a large junction box. I designed this antenna to be nearly pocketable and very quick to deploy. I’ve since found similar antennas for sale online, but I decided to still share this design since others are quite expensive.]]></summary></entry><entry><title type="html">3d printed paracord shaping tool</title><link href="/2025/02/03/3dPrintedParacord.html" rel="alternate" type="text/html" title="3d printed paracord shaping tool" /><published>2025-02-03T00:00:00-05:00</published><updated>2025-02-03T21:06:30-05:00</updated><id>/2025/02/03/3dPrintedParacord</id><content type="html" xml:base="/2025/02/03/3dPrintedParacord.html"><![CDATA[<p>I’ve been designing lots of parts for my portable antennas, and I always use paracord to tie down the ends. I’ve had issues with clearances lately, and I wanted to make a part to somewhat predictably shape the ends of my paracord (when melted). My design is small and quickly printed (five minutes or so), and has been reliably been resulting in 5mm paracord ends. It should probably be printed in PETG, not PLA. I’ve only tested PETG, but I suspect that PLA would stick too easily to the melted plastic of the rope.</p>

<p><a href="https://www.k8zdq.com/assets/Paracord-Tip.stl">Here is an STL for my design</a>, please note that this design is <a href="https://creativecommons.org/licenses/by-nc-sa/4.0/">CC BY-NC-SA</a>, so no commerical usage is allowed.</p>]]></content><author><name></name></author><summary type="html"><![CDATA[I’ve been designing lots of parts for my portable antennas, and I always use paracord to tie down the ends. I’ve had issues with clearances lately, and I wanted to make a part to somewhat predictably shape the ends of my paracord (when melted). My design is small and quickly printed (five minutes or so), and has been reliably been resulting in 5mm paracord ends. It should probably be printed in PETG, not PLA. I’ve only tested PETG, but I suspect that PLA would stick too easily to the melted plastic of the rope.]]></summary></entry><entry><title type="html">3d printing end insulators - 12awg</title><link href="/2024/12/10/3dPrintedEndInsulators.html" rel="alternate" type="text/html" title="3d printing end insulators - 12awg" /><published>2024-12-10T00:00:00-05:00</published><updated>2024-12-11T15:22:19-05:00</updated><id>/2024/12/10/3dPrintedEndInsulators</id><content type="html" xml:base="/2024/12/10/3dPrintedEndInsulators.html"><![CDATA[<p>Through my amateur radio journey, I’ve been using chopped up plastic cutting board to make end insulators for my antennas. I figured that being a 3d printer owner, I should be using something better. I whipped up a little design for a nice looking insulator (much better than hack-saw’d cutting board) that can be printed in less than a half hour. It’s made for 12awg wire, but can be resized to accomodate other wires. <a href="https://www.k8zdq.com/assets/End_Insulator.stl">I’ve uploaded the STL file here.</a></p>

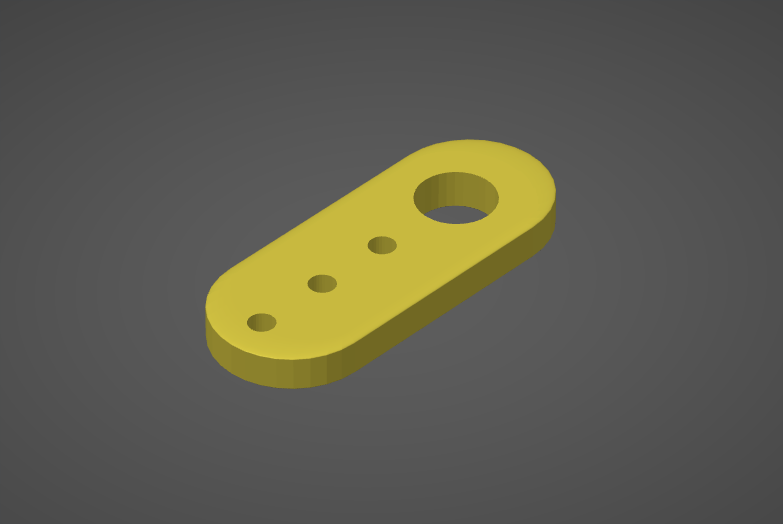
<p><img src="https://www.k8zdq.com/assets/img/End_Insulator.png" alt="Screenshot of the STL loaded into PrusaSlicer" /></p>]]></content><author><name></name></author><summary type="html"><![CDATA[Through my amateur radio journey, I’ve been using chopped up plastic cutting board to make end insulators for my antennas. I figured that being a 3d printer owner, I should be using something better. I whipped up a little design for a nice looking insulator (much better than hack-saw’d cutting board) that can be printed in less than a half hour. It’s made for 12awg wire, but can be resized to accomodate other wires. I’ve uploaded the STL file here.]]></summary></entry><entry><title type="html">Buying 0.1uF RIFAs for Apple II PSU</title><link href="/2024/11/04/ReplacementRifas.html" rel="alternate" type="text/html" title="Buying 0.1uF RIFAs for Apple II PSU" /><published>2024-11-04T00:00:00-05:00</published><updated>2024-11-04T19:53:54-05:00</updated><id>/2024/11/04/ReplacementRifas</id><content type="html" xml:base="/2024/11/04/ReplacementRifas.html"><![CDATA[<p>I just replaced one of the blown up RIFA caps in my Apple II+’s PSU. Most places will point you towards vintage Apple sites selling these caps for a markup.
I purchased my replacement caps from DigiKey, you can find them at</p>

<p><a href="https://www.digikey.com/en/products/detail/kemet/PME271M610MR30/3459439">https://www.digikey.com/en/products/detail/kemet/PME271M610MR30/3459439</a></p>

<p>or under the part number PME271M610MR30. They’re avaliable at Mouser too, but they are significantly backordered.</p>]]></content><author><name></name></author><summary type="html"><![CDATA[I just replaced one of the blown up RIFA caps in my Apple II+’s PSU. Most places will point you towards vintage Apple sites selling these caps for a markup. I purchased my replacement caps from DigiKey, you can find them at]]></summary></entry><entry><title type="html">Send me mail</title><link href="/2024/11/03/Contact.html" rel="alternate" type="text/html" title="Send me mail" /><published>2024-11-03T00:00:00-04:00</published><updated>2024-11-03T18:50:54-05:00</updated><id>/2024/11/03/Contact</id><content type="html" xml:base="/2024/11/03/Contact.html"><![CDATA[<h2 id="through-the-post">Through the post</h2>
<p>You can send me letters/QSLs through USPS at</p>
<div class="language-plaintext highlighter-rouge"><div class="highlight"><pre class="highlight"><code>Clay T Davey
PO BOX 41
Gregory, MI 48137
USA
</code></pre></div></div>
<h2 id="through-the-web">Through the web</h2>
<p>You can send me comments, questions, or other info at
<a href="mailto:clay@k8zdq.com">clay@k8zdq.com</a></p>]]></content><author><name></name></author><summary type="html"><![CDATA[Through the post You can send me letters/QSLs through USPS at Clay T Davey PO BOX 41 Gregory, MI 48137 USA Through the web You can send me comments, questions, or other info at clay@k8zdq.com]]></summary></entry><entry><title type="html">Hello world</title><link href="/2024/11/02/HelloWorld.html" rel="alternate" type="text/html" title="Hello world" /><published>2024-11-02T00:00:00-04:00</published><updated>2025-04-06T16:27:21-04:00</updated><id>/2024/11/02/HelloWorld</id><content type="html" xml:base="/2024/11/02/HelloWorld.html"><![CDATA[<h2 id="welcome-to-my-new-blog">Welcome to my new blog.</h2>
<p>This is a test <em>post</em></p>
<picture>
    
        <source media="(min-width: 320px)" srcset="/assets/resized/FT-891-320x240.jpg" />
    
        <source media="(min-width: 480px)" srcset="/assets/resized/FT-891-480x360.jpg" />
    
        <source media="(min-width: 800px)" srcset="/assets/resized/FT-891-800x600.jpg" />
    
    <img src="/assets/img/FT-891.jpg" />
</picture>

<h2 id="what-is-this-blog-for">What is this blog for?</h2>
<p>I’m not one to publish my thoughts online, but regularly while experimenting with amateur radio, computers, or 3d printing I run into technical difficulties.
I often have road blocks that have seemingly never been documented, even if I see others on the internet with the same issue.
I also run into projects I wish to build that have a lack of instructions.
Hopefully with this (micro?) blog I can do my part in making other people’s work easier.
I intend to post information about projects I am currently working on to help assist anyone who runs across this page.</p>

<h2 id="your-page-is-so-basic">Your page is so basic?!</h2>
<p>I don’t want to overcomplicate what this is, I may not even follow through so why should I bother making it nice.
All CSS does is make my site load slower, and makes it less accessibility-friendly.
This page is generated from markdown with Jekyll, with a custom (mostly empty) theme.
It also includes a plugin for RSS and adaptive image sizes.
Jekyll is a large program for such a simple page, but I like writing in markdown (not html).
The solution that can make posting here as simple as possible, is the solution that will keep me updating the site.</p>]]></content><author><name></name></author><summary type="html"><![CDATA[Welcome to my new blog. This is a test post]]></summary></entry></feed>